Blog
- Details
Node.js is a JavaScript runtime which uses an event-driven, non-blocking I/O model.
Node.js can be an alternative to Java, PHP, .Net, Python, etc to develop web sites and applications using best convention frameworks such as Express.js, desktop applications using Electron.js, mobile apps using Ionic.js or React Native, to name a few of the possibilities.
Node.js is often referenced as just Node, but for easier internet searching, it is best to stick with nodejs.
Note: Node.js can be installed on multiple platforms, but if you are going to use Node.js to develop mobile apps and you want to be able to use an hardware emulator to test your development, you will need to install Node.js in your Host computer, and not a Guest VM.
To install Node.js in Windows 10
Go to https://nodejs.org

You can either download the LTS (long term support) version or the current version. Normally you would think to grab the latest, but for Node.js, it is better to use the LTS version.
Click the LTS button and download Node.js.
If you click on the LTS schedule, you will see how long Node.js intends to support both versions.

As you can see, the Current version will no be supported for as long. Node.js is following the pattern of even releases are for production while odd releases are for development. Also, some Node.js frameworks, such as Ionic.js, do not work well with the Current version, due to library dependencies. It is best to use the LTS version unless you find a particular need for the Current.
Double click the Node.js version you downloaded (node-v8.9.3-x64.msi) to begin installation.
Click Next

The normal agree to everything which you will never read but it is required to install any software.
Click Next

Choose a installation directory
The default is C:\Program Files\nodejs

For development, it can be better to keep your tools under a common directory, such as C:\Dev\. Doing so facilitates backups, deletions, you will have less typing to get to a directory, etc
Click Change and select your installation location
Click Next

By default all the options are enabled, leave them so.
- npm is a package manager for Node.js and other software; it is the common method of installing Node.js related frameworks and libraries.
- Add to Path is import as you will need to use the command line at times with Node.js
Click Next

Actually start the installation
Click install

And your done installing.
Click Finish

To verify that Node.js was installed, open a command prompt
Start -> Run -> type cmd and press enter
Instead of the Windows command prompt, you may want to use ConsoleZ which gives you more developer friendly options, such as easier copy/paste, tabs, etc
Change the directory to where you installed Node.js
cd C:\Program Files\nodejs
or
cd C:\Dev\nodejs
Verify the version of Node.js
node -v
The output should be the same you installed
You can also check the version of npm
npm -v
To update npm and other Node.js libraries you will install,
npm update
There will probably be an update to npm at least

You now have Node.js installed.
Your on your way to developing with frameworks such as Express.js, desktop applications using Electron.js, mobile apps using Ionic.js or React Native, to name a few of the possibilities.
End of document. Thanks for reading.
- Details
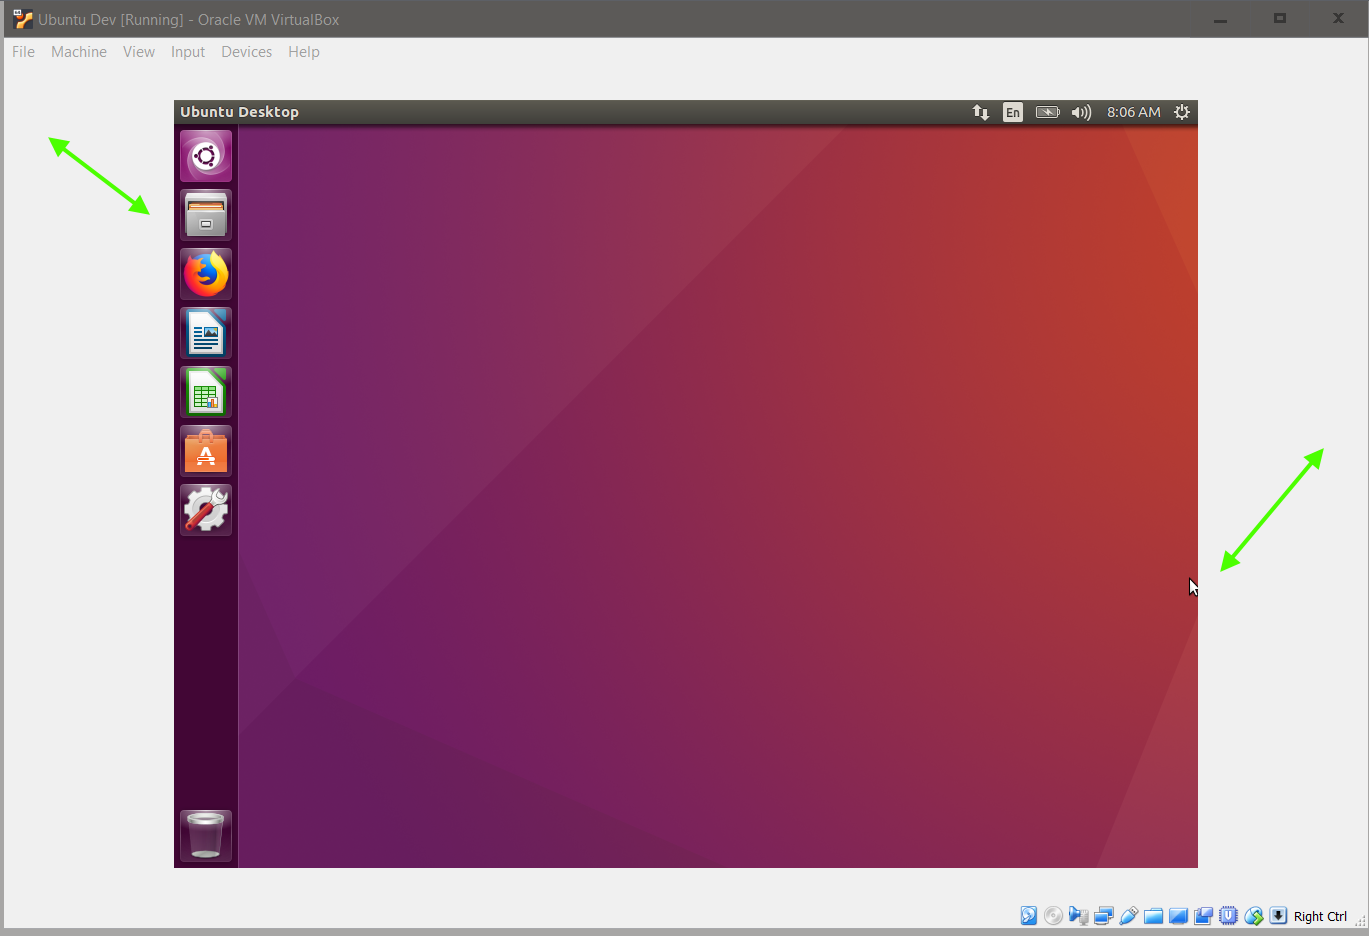
To enable the full functionality of VirtualBox, you often have to install Guest Additions, which enable features such as shared drives and better video support, such as being able to auto size the Guest VM display to the current dimensions of the VirtualBox gui, or to view the Guest VM in full screen.
“Guest Additions are designed to be installed inside a virtual machine after the guest operating system has been installed. They consist of device drivers and system applications that optimize the guest operating system for better performance and usability.”
When you upgrade the OS within a Guest VM, it’s kernel may change requiring you to re-install Guest Additions. You will know the Guest Additions need to be re-installed when basic features such as viewing the Guest VM in full screen no longer work.
To install VirtualBox you can follow this guide How to Install VirtualBox
To install a Ubuntu VM you can follow this guide How to Install a Ubuntu Virtual Machine
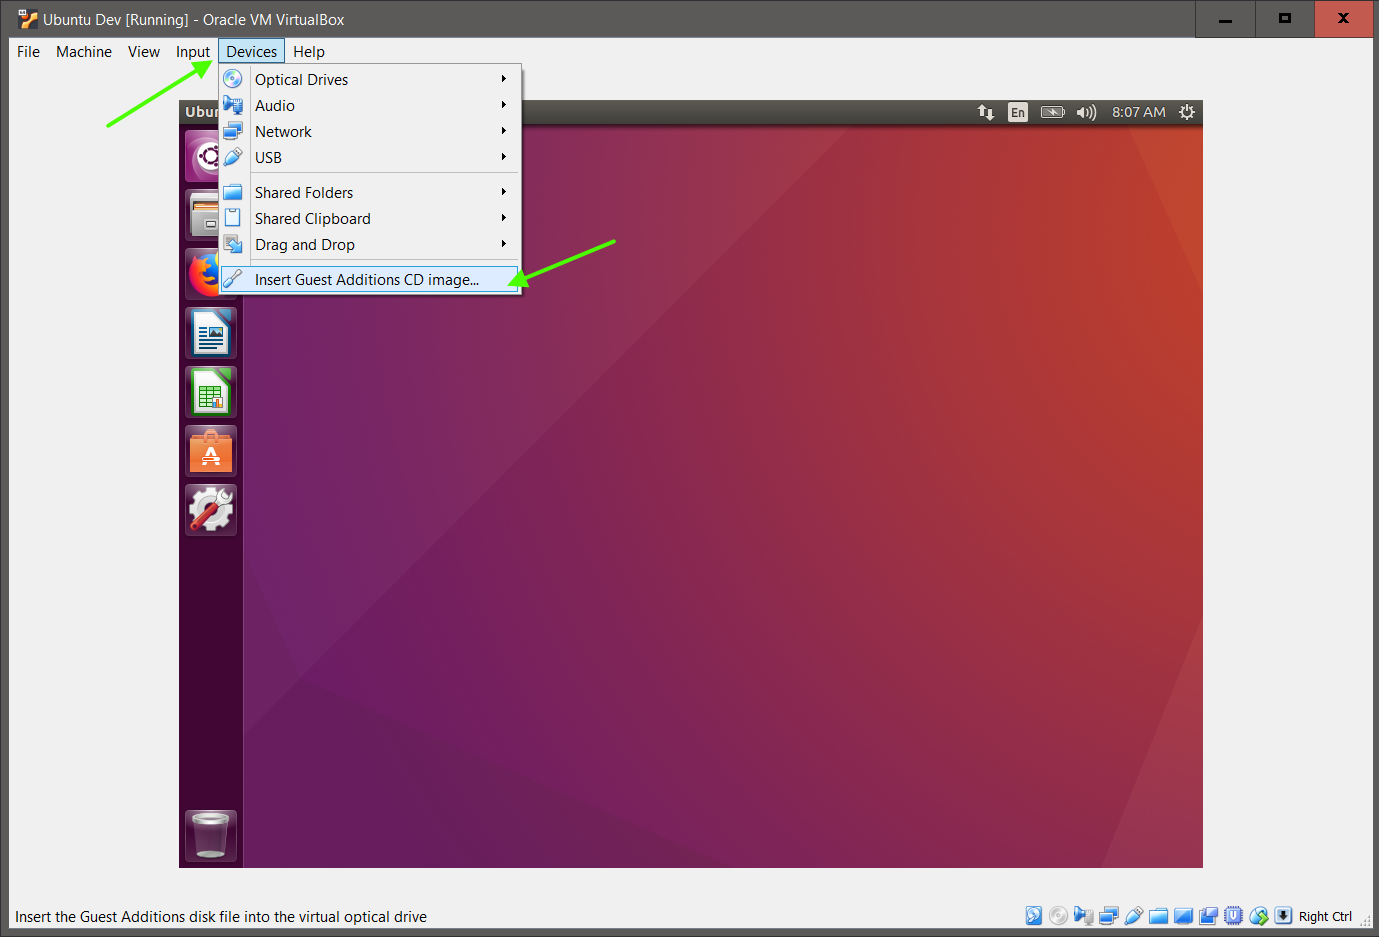
To re-install VirtualBox Guest Additions
Click Devices and choose Insert Guest Additions CD Image
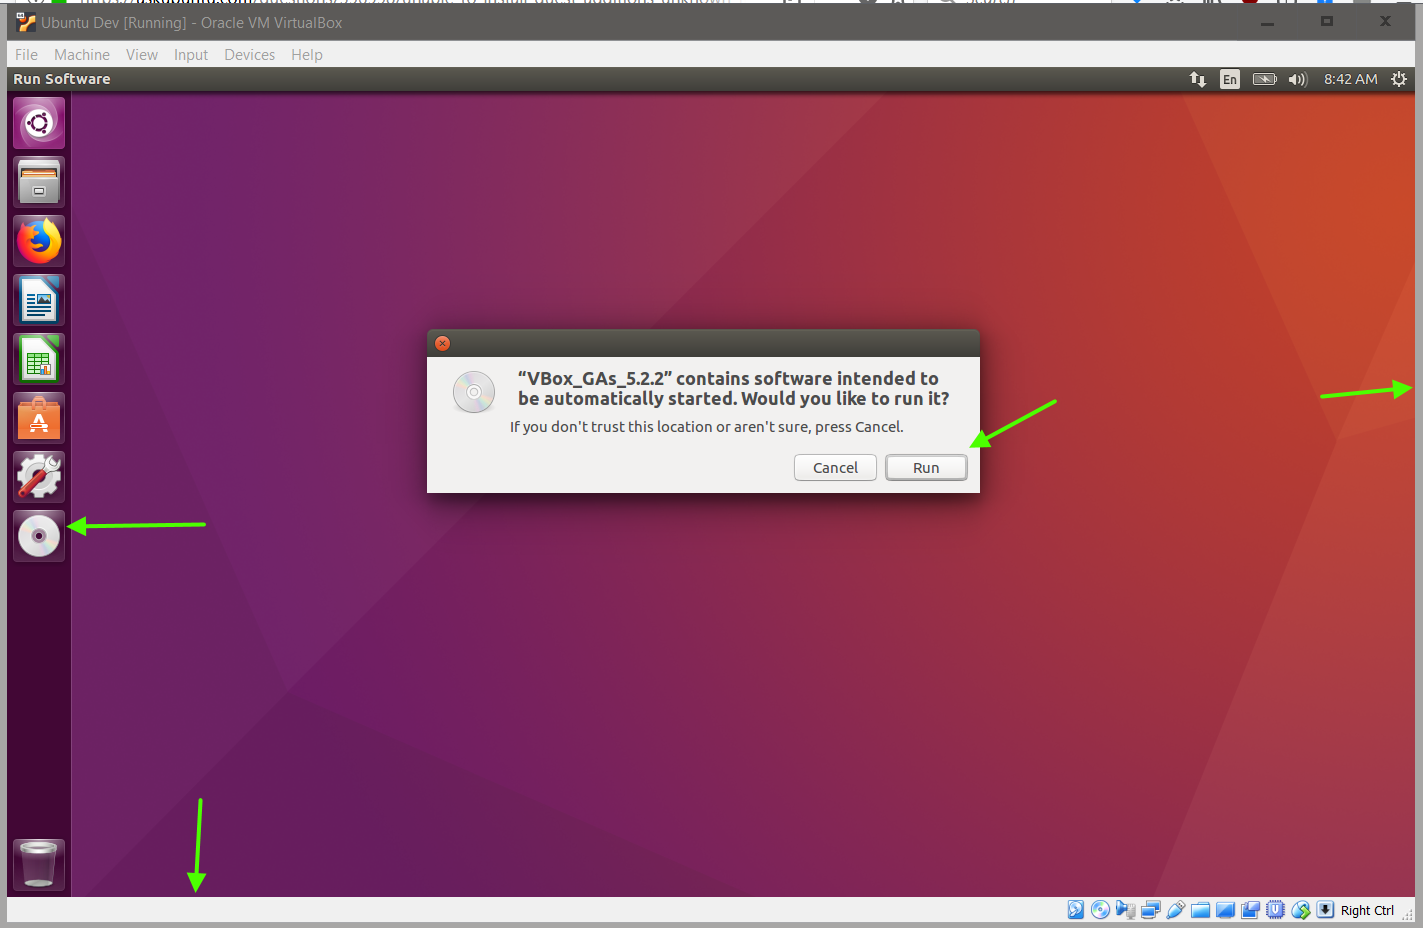
Most likely you will be able to Run the Guest Additions and then reboot and be back to a fully functional VirtualBox Guest VM.
But, sometimes the Guest Additions CD does not run ie does not mount

Some possible solutions are:
• Simply reboot to ensure the current OS upgrade has been applied
The try to re-install the Guest Additions again.
If that works, your done!
• If not, try to manually mount the Guest Additions CD
From a terminal window (right click on Ubuntu desktop -> Terminal)
sudo mkdir --p /media/cdrom
sudo mount -t auto /dev/cdrom /media/cdrom/
ls -l /media/cdrom/
sudo sh VBoxLinuxAdditions.run
If that works, your done!
To check the device location of the CD ie /dev/cdrom,
vi /var/log/kernel.log
Look for CD (type forward slash CD and press enter ie /CD)
You should see a reference to /dev/cdrom or /dev/sr0
More details at askubuntu unable-to-mount-virtualbox-guest-additions
• If when you run mount you receive an error
sudo mount -t auto /dev/cdrom /media/cdrom/
mount: unknown filesystem type 'iso9660'
This means a basic kernel module was not loaded,
so re-install the kernel and reboot.
sudo apt-get install --reinstall linux-image-$(uname -r)
(uname -r)
Displays the kernel version, making the --reinstall command above generic
4.10.0-42-generic
More details at askubuntu unable-to-install-guest-additions-unknown-filesystem-type-iso9660

After rebooting you may notice that the Guest VM resizes and runs as full screen, as expected.
It is still a good idea to re-install the Guest Addition CD at this point to ensure the kernel has been updated with VirutalBox additions.
To re-install VirtualBox Guest Additions
Click Devices and choose Insert Guest Additions CD Image
Then choose Run
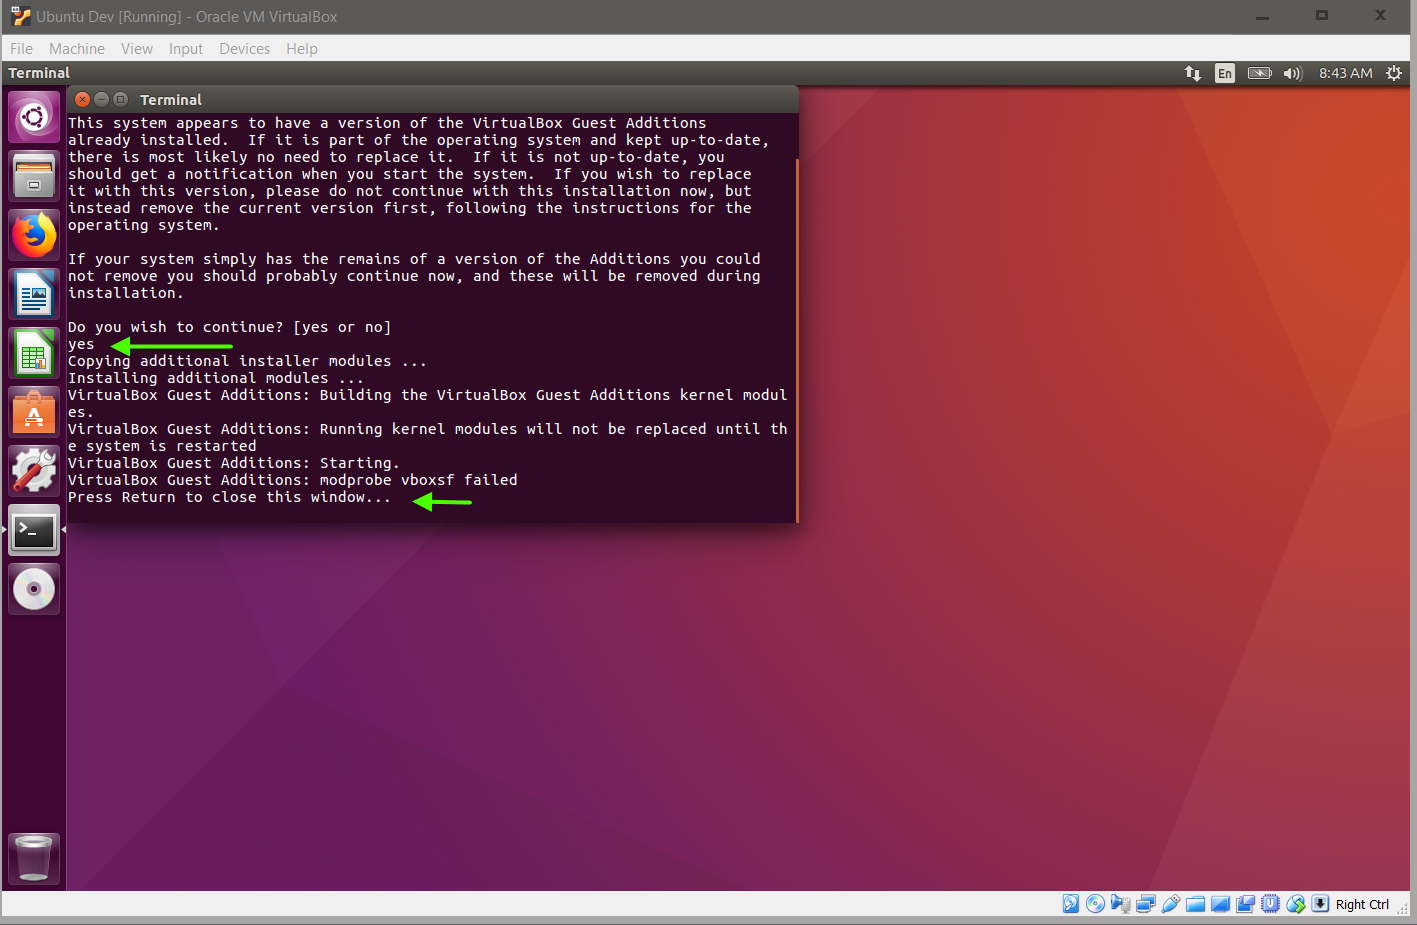
The Guest Additions may prompt you to confirm that you are re-installing
Type yes and press enter
Press enter to close the window
And once more reboot
You should have a fully functional VirtualBox again.
If you are still having issues, check the askubuntu links for more ideas
unable-to-install-guest-additions-unknown-filesystem-type-iso9660
unable-to-mount-virtualbox-guest-additions
- Details
Within VirtualBox, you can enable shared drives to facilitate the transfer of files between the Guest VM and the Host computer.
To install VirtualBox you can follow this guide How to Install VirtualBox
To install a Ubuntu VM you can follow this guide How to Install a Ubuntu Virtual Machine.
To enable Shared Folder between the VirtualBox Host and Guest VM:
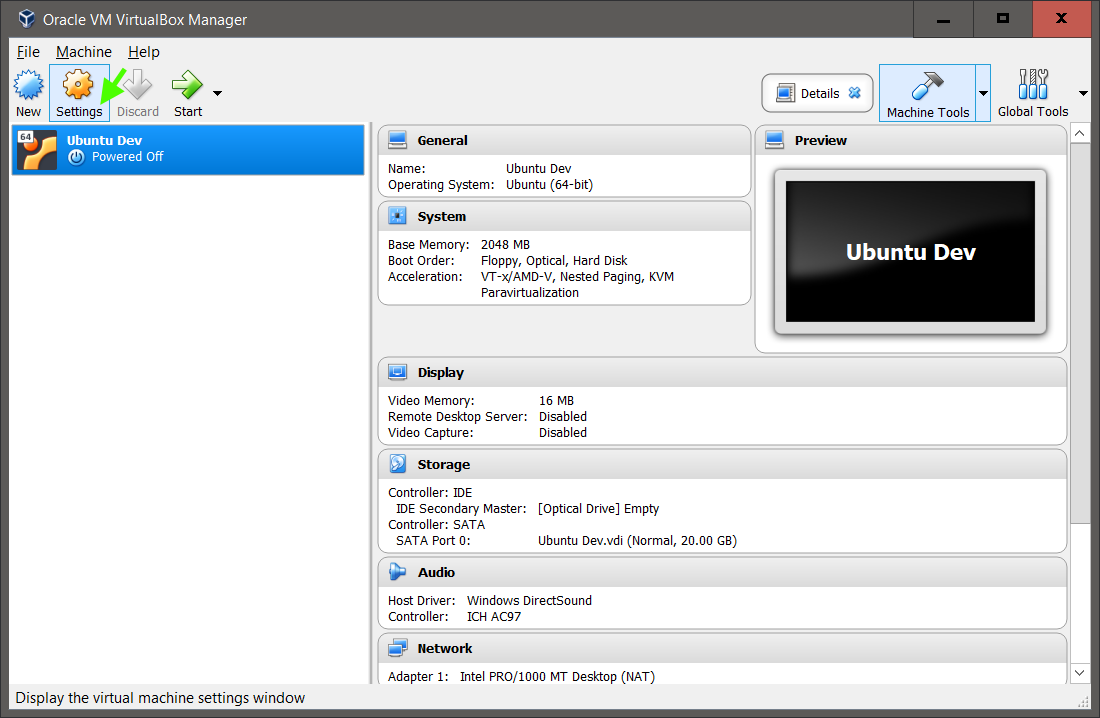
Form VirtualBox, select your VM and click Settings

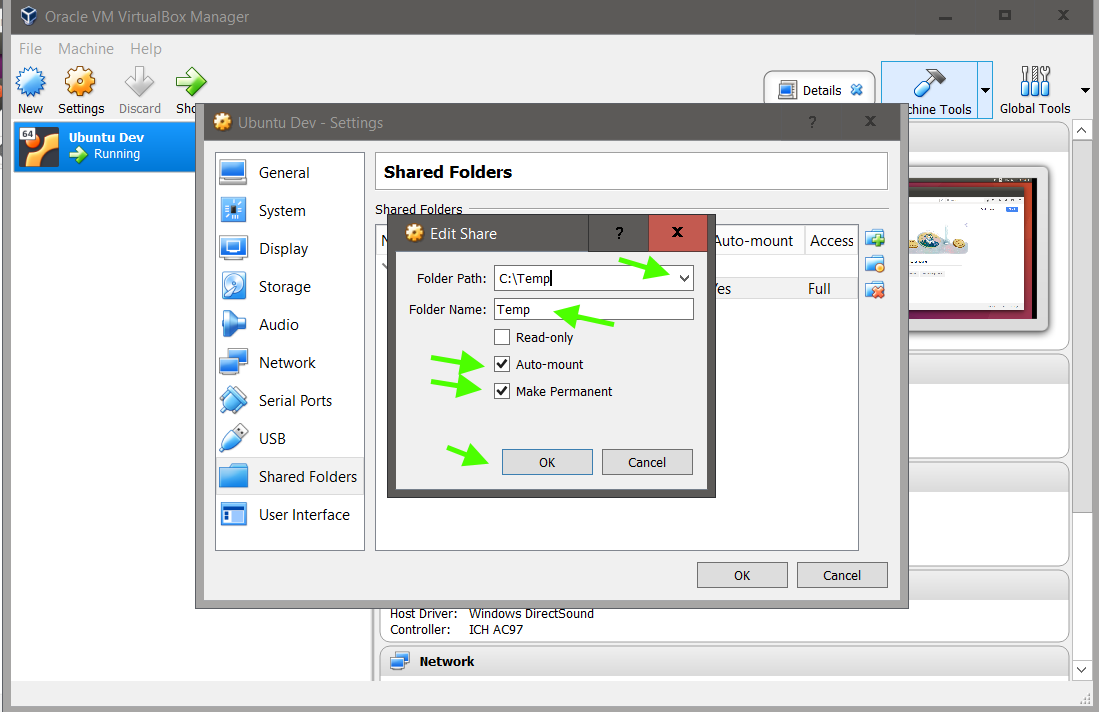
Select Shared Folders, click Add a folder, and choose a local folder, such as
C:\Temp or C:\Dev\VMs\Shared
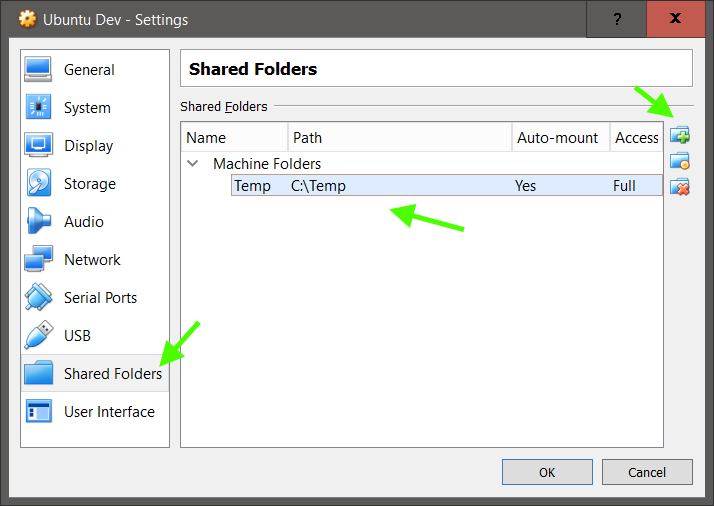
Select Auto Mount and Permanent, to facilitate usage.
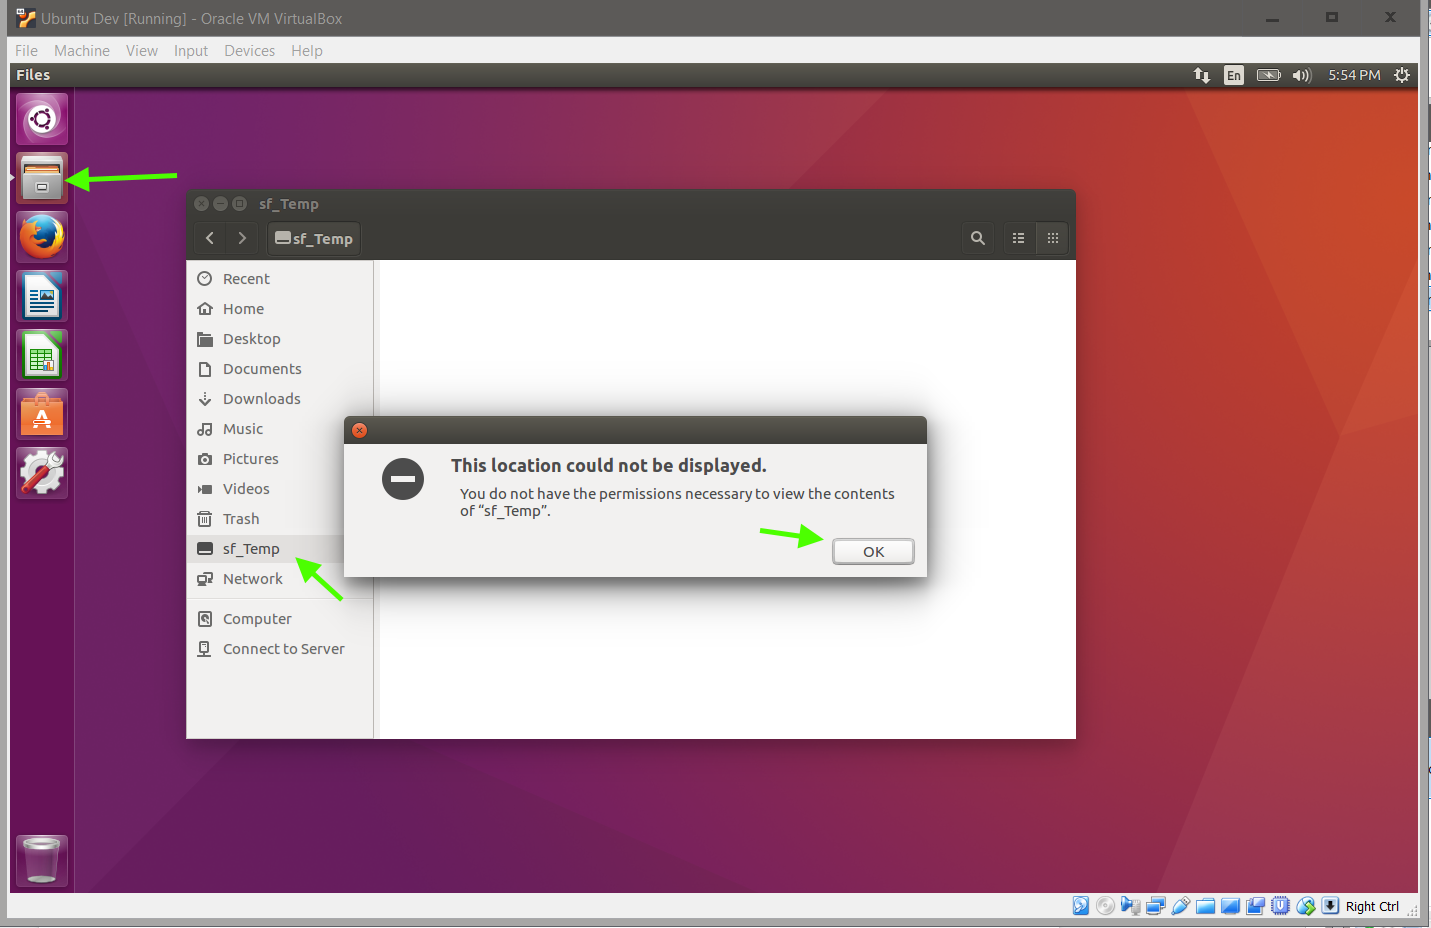
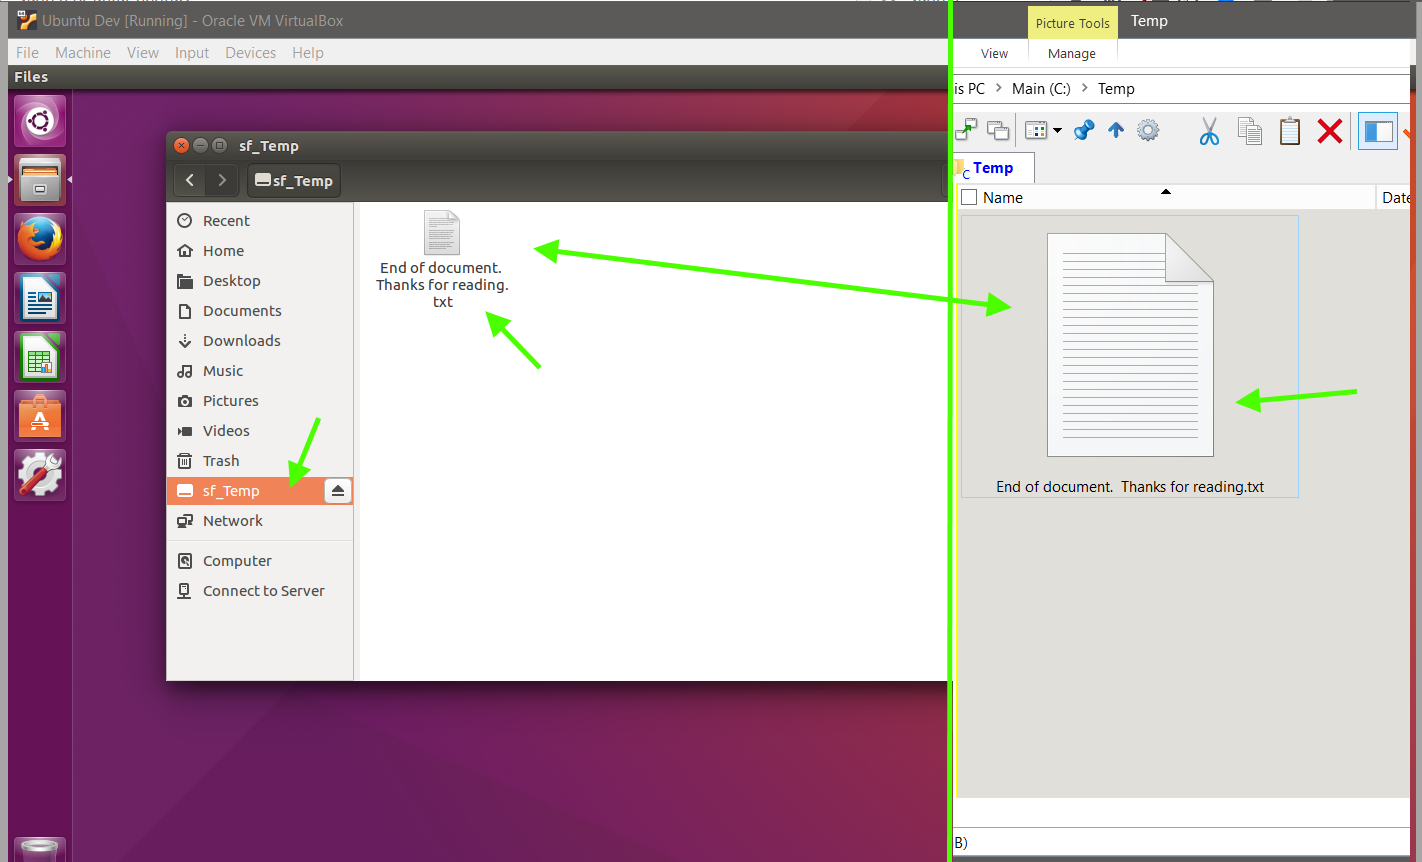
Start the VM and try to access the shared drive.
With Ubuntu, and maybe other Linux versions, you will not have permission, by default.
Per the discussion on StackExchange
Open a Terminal and add your user to the vboxsf user group
sudo usermod -aG vboxsf [youruser]
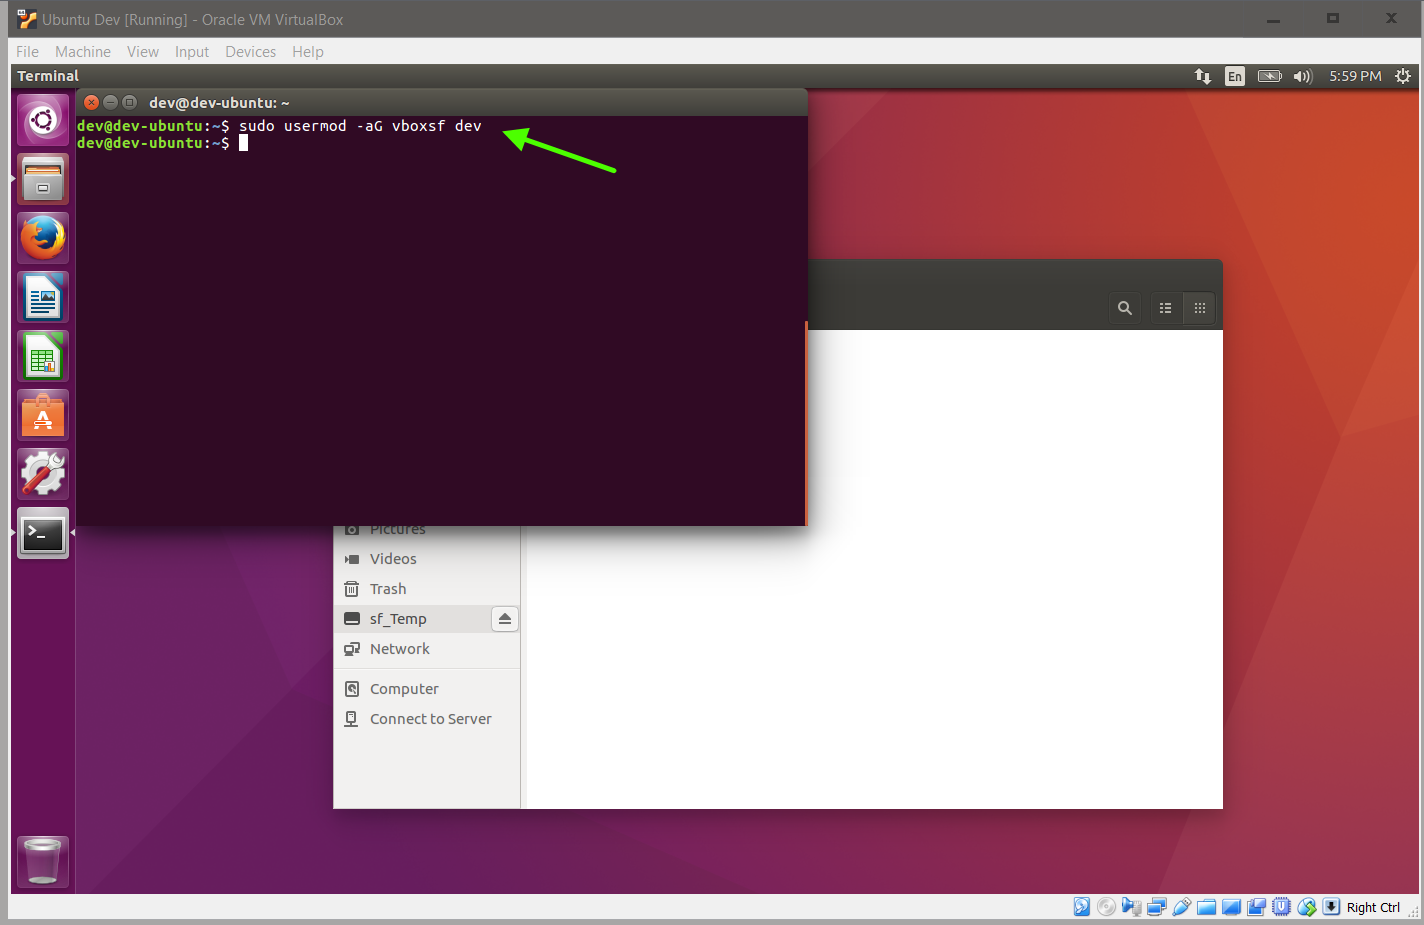
You will need to reboot your VM for these changes to take effect
And copy a file into the shared folder; you should be able to access it from either the VM or the Host.
- Details
VirtualBox is a cross-platform virtualization software, which allows you to run another Operating System (such as Ubuntu) from your current Operation System (such as Windows). Using VirtualBox, you can try out, play with, test, or develop with other Operating Systems without having to reinstall your computer or potentially more complicated try to multi boot your computer.
In virtualization software terms, your computer is called the Host, while the other Operating Systems, or OSs for short, you install through the virtualization software, VirtualBox, are called Guests. Guests are often called Virtual Machines, or Guest VMs, or VMs for short. You can install as many Virtual Machines as you want. So you can try Ubuntu, Mint Linux, Windows Insider, Windows Server, Mac OSX, etc all from within your current Windows or Linux Host. The Virtual Machines are also self contained within one folder so you can backup or transfer the Virtual Machine to another computer. Thus you have a portable Operating System; of course, with the requirement of installing VirtualBox on the other Host computer.
Requirements: VirtualBox needs to be installed. You can follow this guide How to Install VirtualBox
Launch VirtualBox
The Settings option allows you to further customize and adjust the hardware requirements of the VM
Some Settings you may want to change for most VMs follows:
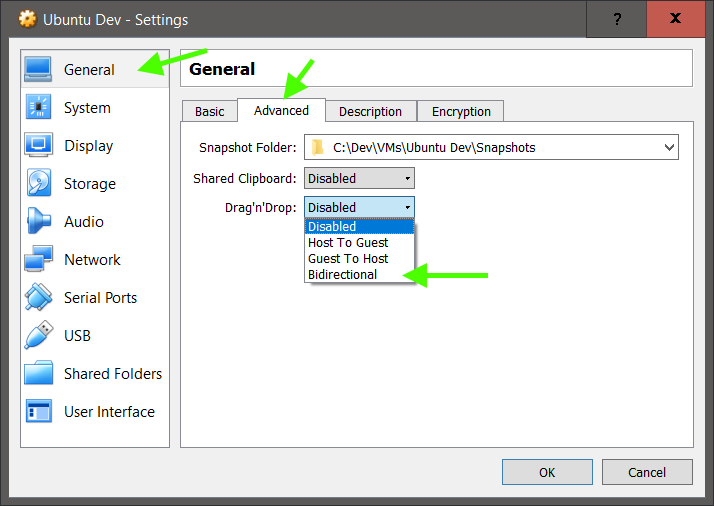
General -> Advanced
Enable Bidirectional Shared Clipboard and Bidirectional Drag’n’Drop
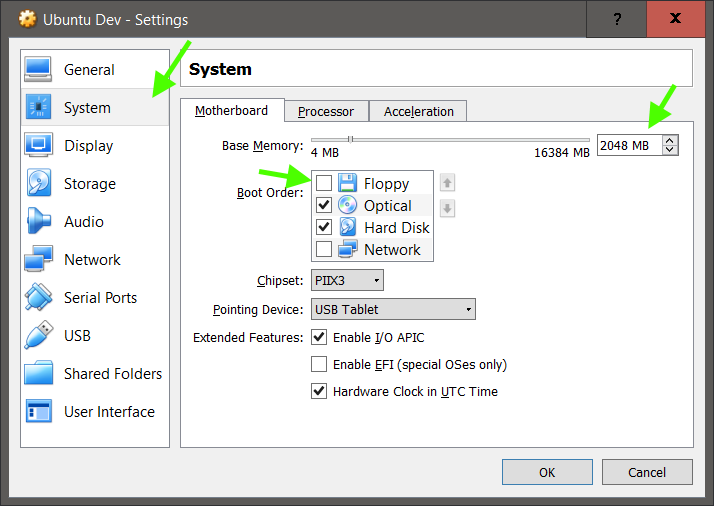
System -> Motherboard
You can adjust the memory allocation
Uncheck the Floppy from Boot Order, as it's not needed for modern OSs in VMs
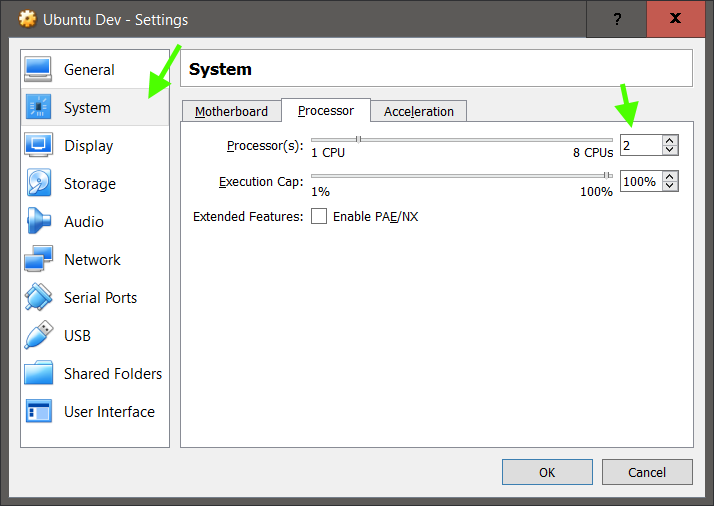
System -> Processor
You can adjust the processor usage of the VM. If you have 4 or cores on your CPU, you can allocate some of them to the VM. 2 cpus allows some multitasking to occur.
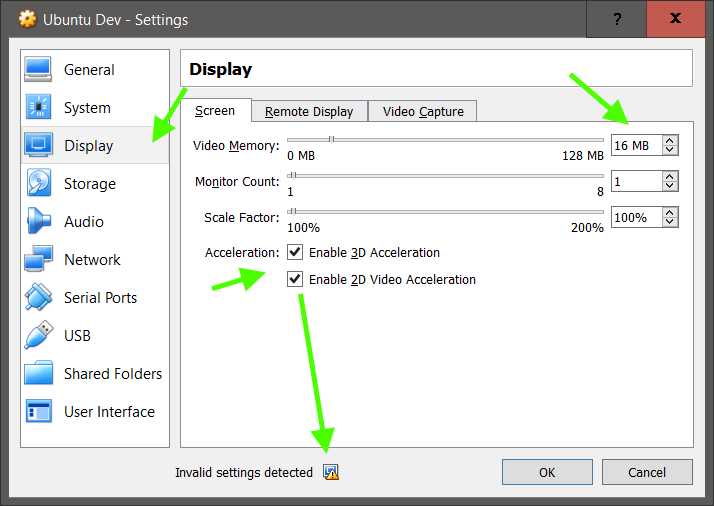
Display -> Screen
You can enable 3D and 2D acceleration. Support will vary based on your Host computer and the Guest VM. Linux VMs do not support 2D acceleration, but don’t worry, they will still work smoothly. Also, similar to System Memory, do not over allocate video memory as that can negatively impact your Host computer.
Note: You will also have to install VirtualBox Guest Additions within the Guest VM. You can follow this guide How to Install a Ubuntu Virtual Machine or view the VirtualBox docs
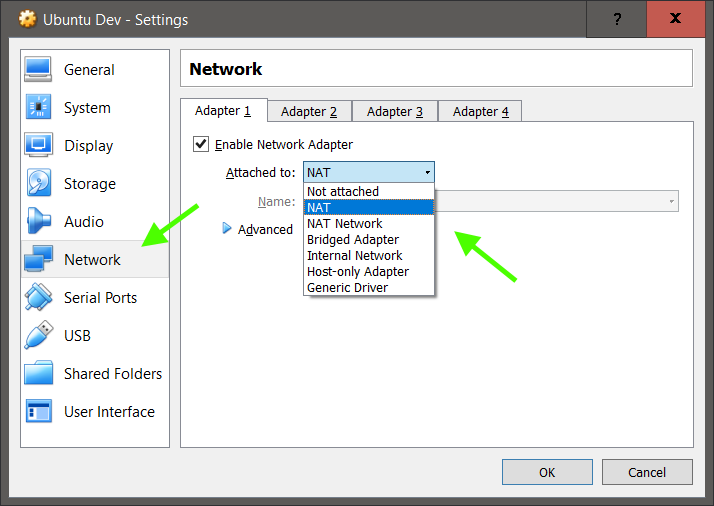
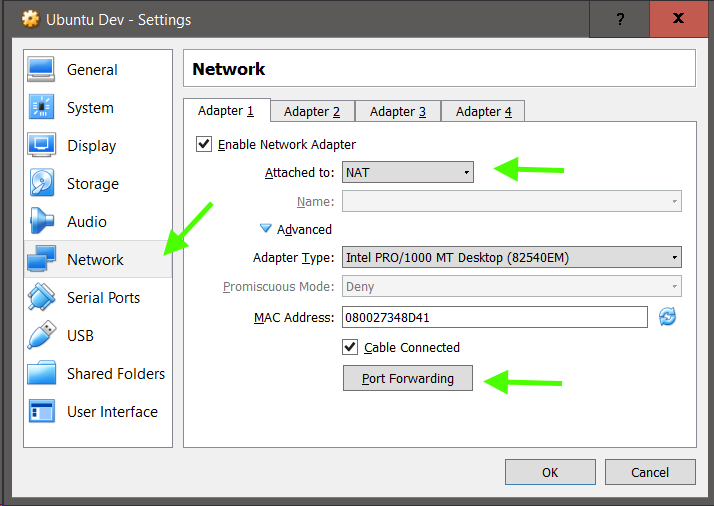
Network -> Adapter 1
The default of NAT is fine. This allows the VM to use your Host computer network for internet access, but the VM does not get it’s own IP address. Another option is Bridged Adapter which will make the VM request it’s own IP address, and thus show up on your network.
While both options should work, depending on your Host computer, one or neither option may work without searching the internet for a solution, unfortunately.
Search Bing or Google for current Virtual Box networking issues.
Network -> Adapter -> NAT -> Advance
NAT (Network Address Translation)
As the VM will not have it’s own IP address, you can set up port forwarding to access the VM Web and other servers. However, you will need the Host IP address and the VM IP address, which requires the VM to have been installed and run once.
NAT Network is a new NAT implementation for VirtualBox which you can try if NAT doesn’t work ie no internet access from the VM. You can also try different Adapter Types, though the defaults should be ok.
Network -> Adapter -> Bridged Adapter -> Advance
Bridged Adapter effectively creates a new network interface in software, thus allowing the VM to have it’s own IP address, which can facilitate the access of the VM Web and other servers.

Shared Folders -> Add a folder
Adda shared folder to facilitate copying files between the Guest VM and the Host computer.
Note: You will also have to install VirtualBox Guest Additions within the Guest VM. You can follow this guide How to Install a Ubuntu Virtual Machine or view the VirtualBox docs

Click OK and your Settings are saved. You can always update the hardware settings later, minus changing the OS once a OS is installed.

End of document. Thanks for reading.